Will Ethereum Grow in 2025?
BITmarkets Team
Jun 19, 2025

In yesterday’s analysis of Bitcoin, we outlined the conditions under which a potential pullback could occur. As is often the case in the crypto market, Ethereum shows a strong positive correlation with Bitcoin.
Based on this correlation, the possibility of a bearish move in the second-largest cryptocurrency remains in play—especially if key market triggers are activated. But which triggers could traders watch?
Ethereum technical analysis

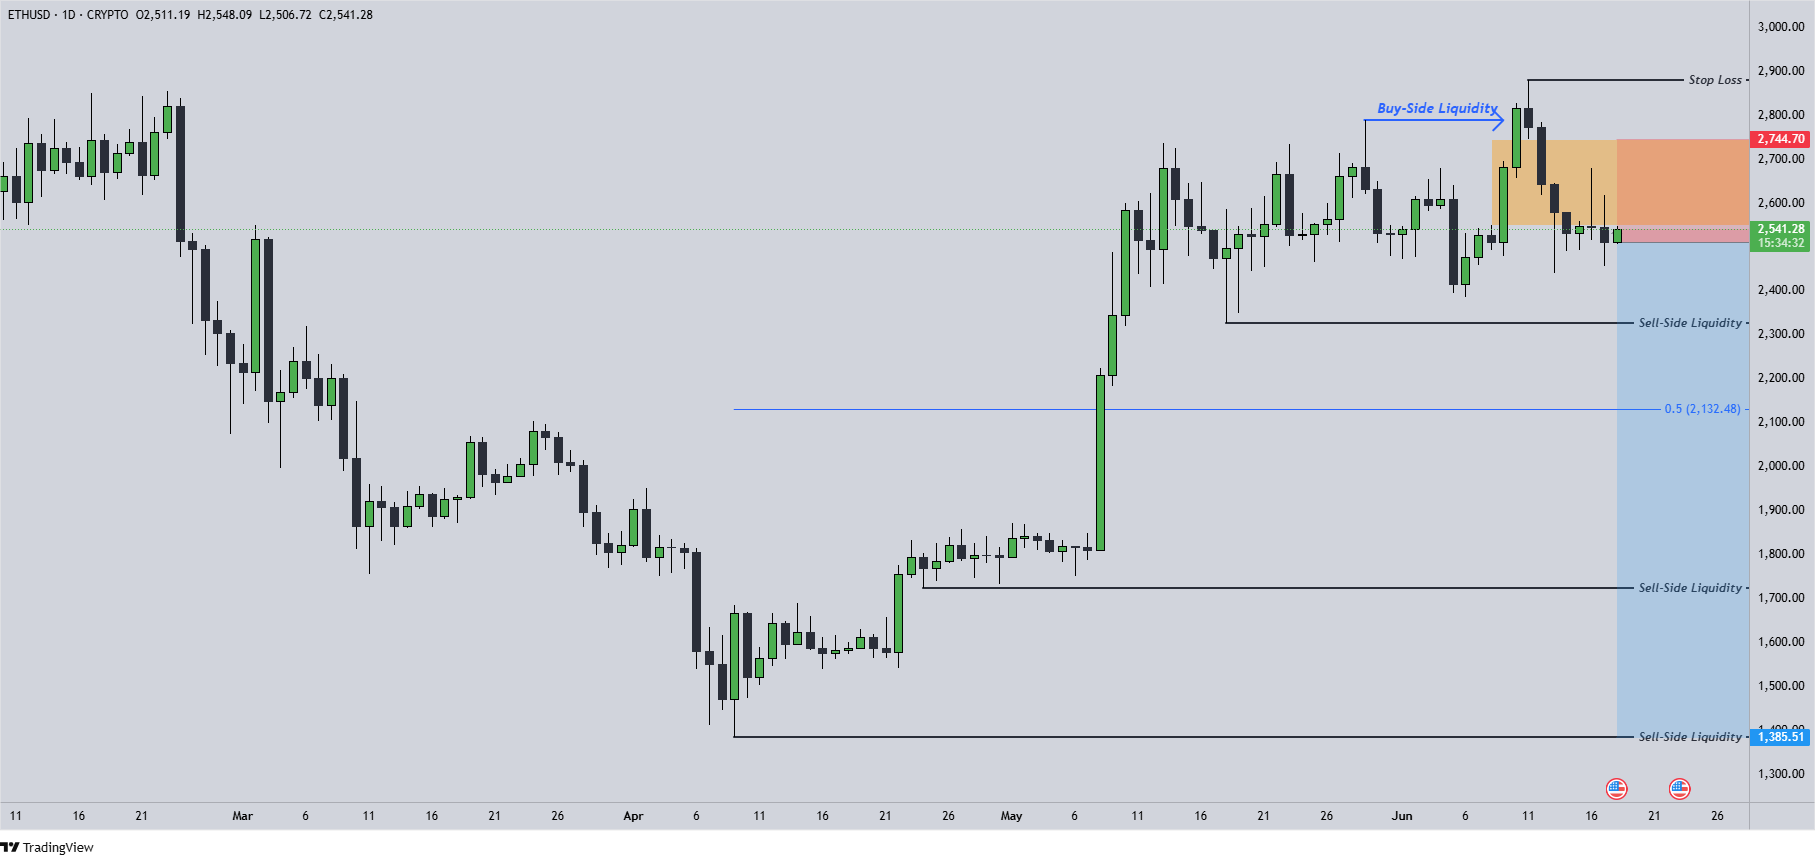
ETHUSD - 1 Day Time Frame
Ethereum entered a neutral correction phase around the turn of May and June, forming a textbook liquidity buildup on both sides of the market. On the lower end, Sell-Side Liquidity remains untouched. More importantly, on the upper end, Buy-Side Liquidity was not only targeted but taken out in an impulsive move.
This aggressive upward movement allowed institutional participants to open sell positions and also established a strong support zone. At first, this structure suggested a bullish outlook for future price action.
However, the sentiment shifted dramatically when the price closed below the lower boundary of this support zone on the daily timeframe. For reference, this zone is highlighted in orange on the attached chart.
Once breached, the support level flipped into resistance. The bearish momentum was further reinforced by the formation of an additional resistance area due to the strength of the downward move. Together, these two resistance zones, combined with the appearance of consecutive bearish daily candles—both showing long upper wicks—have created a clear technical setup for potential short positions.
Ethereum price target
The first step is disciplined risk management, beginning with a well-placed protective Stop Loss. In Ethereum’s current structure, the Stop Loss can be logically positioned just above the internal higher high marked on the chart. This placement can protect positions against reversals that would invalidate the bearish thesis.
As for Take Profit levels, traders may look to Sell-Side Liquidity zones as logical targets. These areas often serve as optimal exit points for locking in gains. Additionally, it is important to monitor how price behaves near the 0.5 Fibonacci retracement level—a zone commonly referred to as the “discount area.”
A strong reaction here may indicate a shift in momentum and open the door to a renewed wave of bullish interest.


